> For the complete documentation index, see [llms.txt](https://uni.fotello.co/llms.txt). Markdown versions of documentation pages are available by appending `.md` to page URLs; this page is available as [Markdown](https://uni.fotello.co/delivering-listings/customer-portal.md).
# Customer Portal Setup
Give your customers a branded portal where they can log in, view delivered listings, download media, make payments, and request revisions - all in one place.
To access Customer Portal settings, go to **Studio Manager → Customer Portal** or use [this link](https://app.fotello.co/dashboard/customer-portal).
### Customer Portal settings options
Use this page to manage these Customer Portal settings:
* **Adjust panel access** — control which editing tools customers can use on delivered photos
* **Download access** —control when customers can access their files by requiring payment before downloads are enabled.
* **Customer rescheduling**— let customers reschedule from the Customer Portal
* **Tutorial video** — show customers a short guided tour of the portal
### What you can do on this page
You'll see:
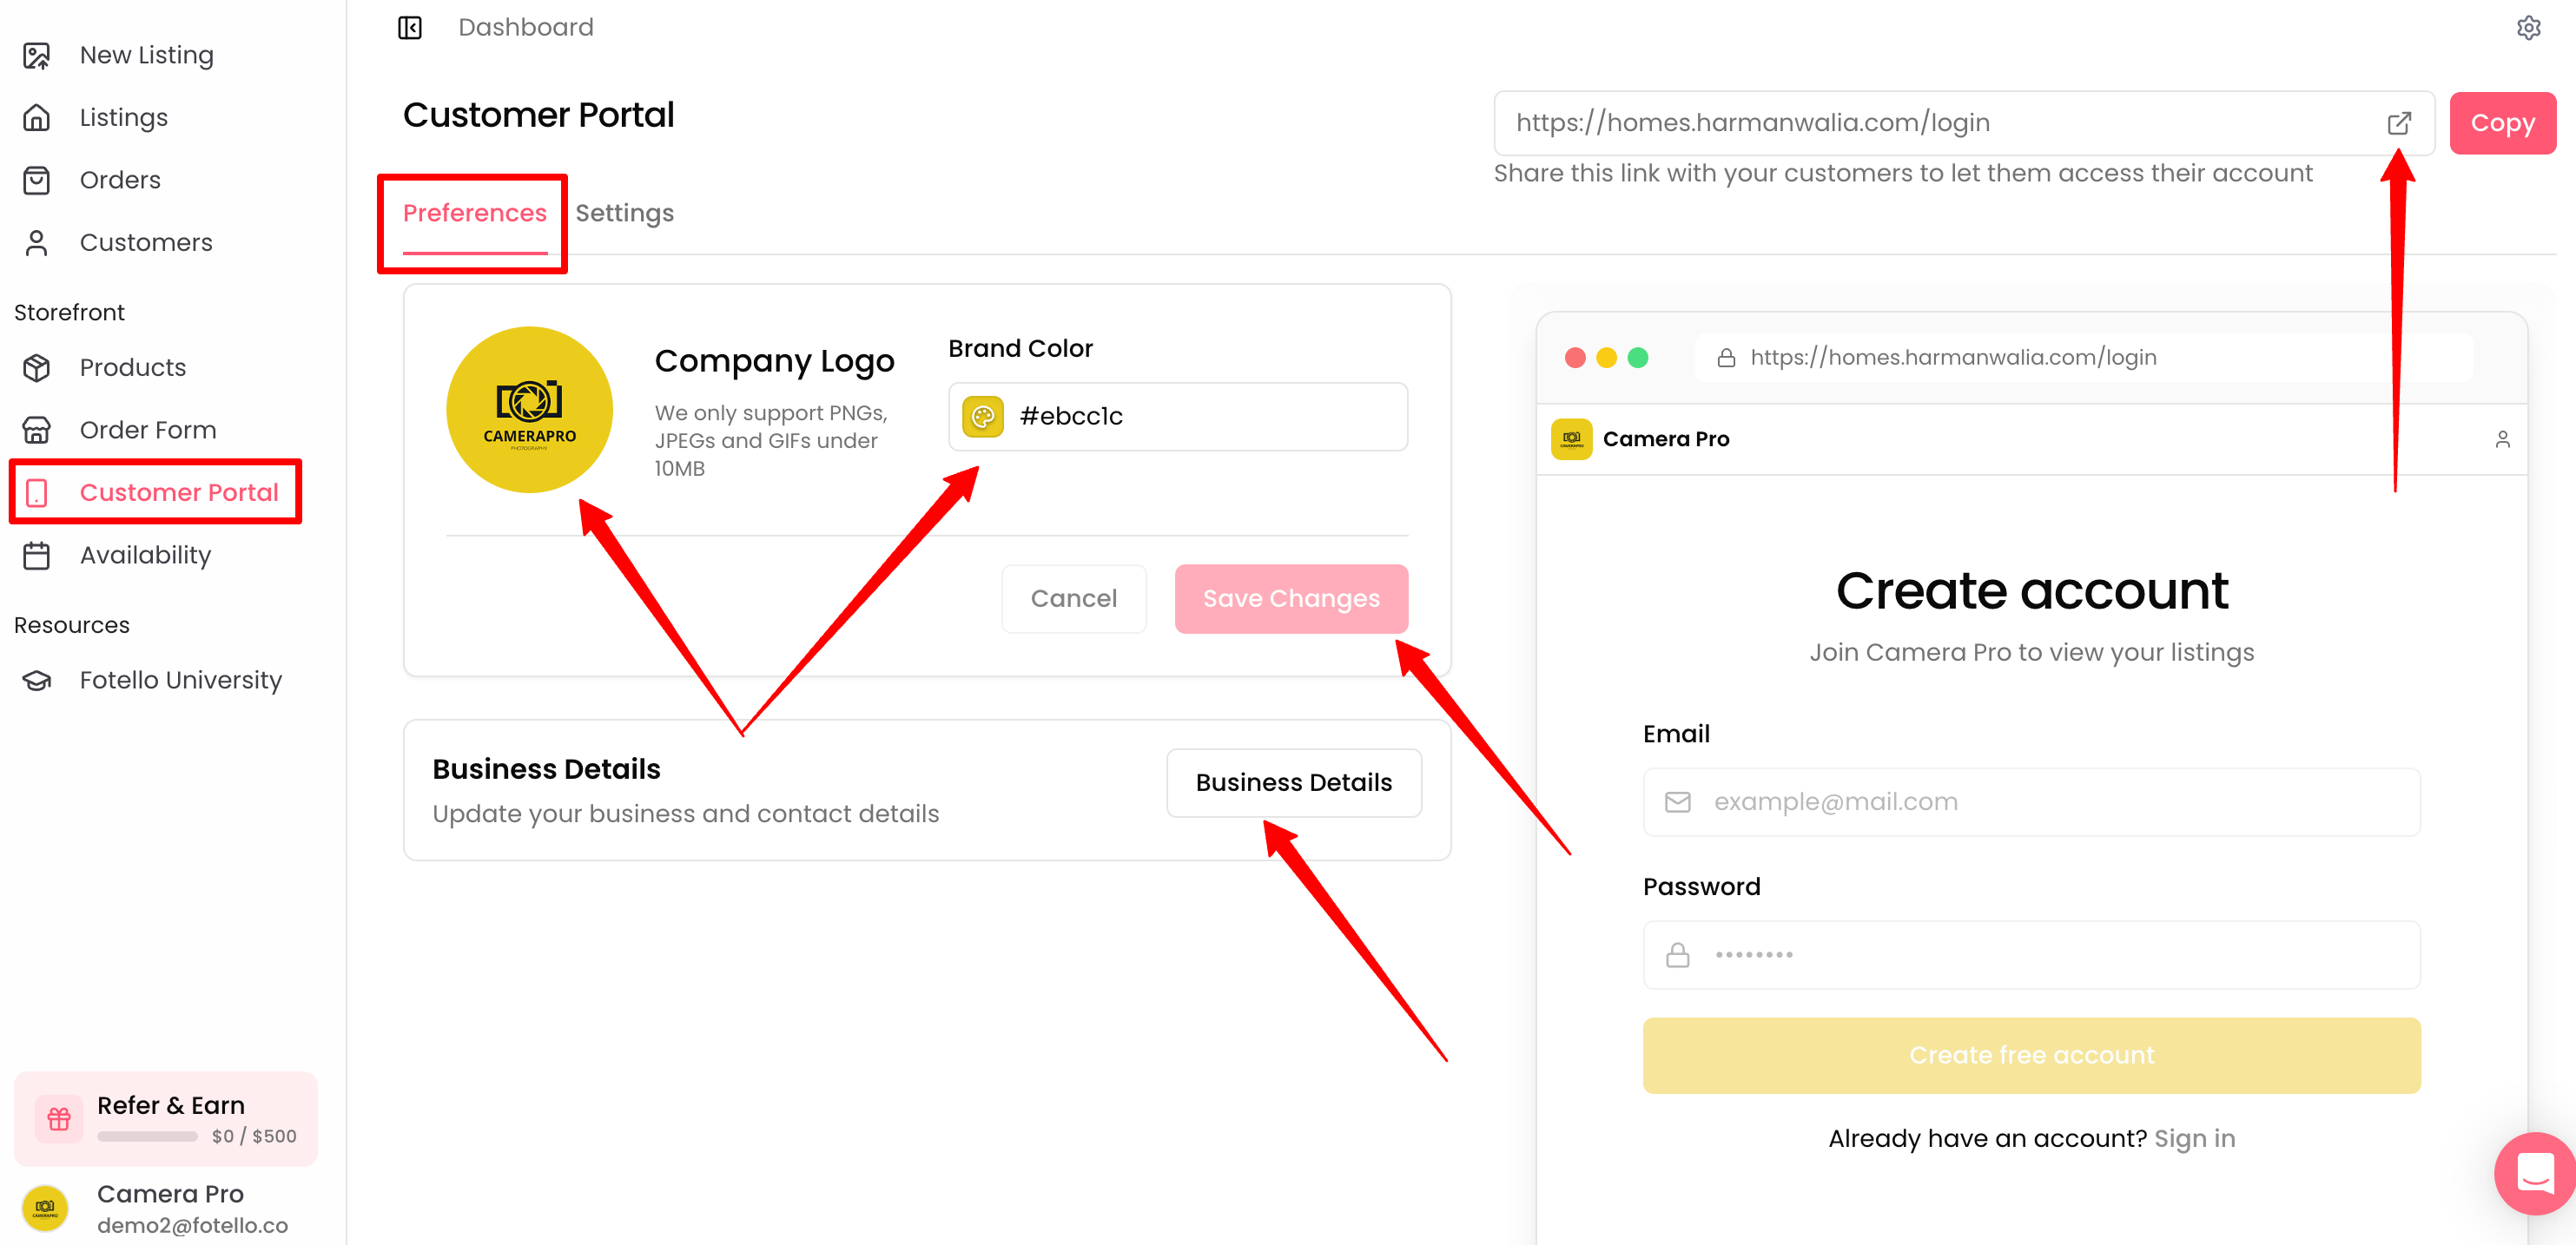
* Your Customer Portal link
* A live preview of what customers see
You can:
* Click the open-in-new-tab button to view it yourself
* Click **Copy** to paste the link on your website or share it with customers
* Set **Adjust panel access** to control which editing tools customers can use on delivered photos
* Set **Customer rescheduling** to control whether customers can move their own appointments
### Let customers reschedule their own appointments
You can let customers reschedule their own appointments from the Customer Portal.
Turn on **Let customers reschedule their own appointments** to enable self-service rescheduling.
Use **Reschedule cutoff hours** to control how close to the appointment customers can still make a change.
After the cutoff is reached, the reschedule option is no longer available to the customer.
### Adjust panel access
Choose what level of editing your customers have access to:
| Full Access | Focused Access | Hidden |
| ------------------------------------------------------------------------------------------------------------------------------------------------------------------------------------------------------------------------------------ | --------------------------------------------------------------------------------------------------------------------------------------------------------------------------------------------------------------------------------------- | ----------------------------------------------------------------------------------------------------------------------------------------------------------------------------------------------------------------------------- |
| All adjust panel tools. | Profiles, remove tool, and revision requests only. | Adjust panel completely hidden. Can only view and download photos. |
|  |  |  |
### Customer rescheduling
Decide whether customers can reschedule their own appointments from the Customer Portal.
Turn on **Let customers reschedule their own appointments** to give customers a self-service way to move their booking to a new time. When it's off, customers contact you directly and you handle the change for them.
When the toggle is on, set a **Reschedule cutoff** (in hours) to protect the time right before an appointment. Customers can't reschedule once the appointment is within that window — for example, set `48` to stop changes inside the last two days.
{% hint style="info" %}
You can always reschedule any appointment yourself from the order, regardless of this setting. See [Rescheduling](/availability-and-scheduling/rescheduling.md).
{% endhint %}
### Show customers a guided tour
Turn on a short tutorial video that walks your customers through the Customer Portal, so they can browse and download their media on their own without reaching out to you.
Under **Tutorial video**, turn on **Enable guided tour**. Want to see it first? Click **video** in the description to preview it.
Once it's on, a **Quick Tour** button appears at the top of every shared listing page. Your customer clicks it to watch the overview in a pop-up player, then closes it and keeps browsing. See [Shared Listing Page](/customer-portal/shared-listing-page.md) for what your customer sees.
### Make it feel like your business
Customize your Customer Portal using your business settings for a seamless, branded experience.
* [Branding](/business-details/branding.md) (logo + brand color)
* [Business Details](/business-details/personal-details.md) (name, contact info, socials)
* [Domain](/business-details/domain.md) (custom URL like `book.yourdomain.com` — Ultimate plan)
### Ways to share your Customer Portal
* **Website:** Add a "Book Now" button or a client login page linking to your portal.
* **Social:** Drop the link in your Instagram bio, Facebook page, or LinkedIn profile.
* **Direct messages:** Send the link over text, email, or WhatsApp when a client reaches out.
* **Email signature:** Include a portal link so every email doubles as an opportunity.
{% hint style="info" %}
The Customer Portal is fully responsive and mobile friendly.
{% endhint %}
---
# Agent Instructions
This documentation is published with GitBook. GitBook is the documentation platform designed so that both humans and AI agents can read, navigate, and reason over technical content effectively. Learn more at gitbook.com.
## Querying This Documentation
If you need additional information that is not directly available in this page, you can query the documentation by asking a question.
Perform an HTTP GET request on the following URL with the `ask` and `goal` query parameters:
```
GET https://uni.fotello.co/delivering-listings/customer-portal.md?ask=&goal=
```
`ask` is the immediate question: it should be specific, self-contained, and written in natural language.
`goal` is what the user is ultimately trying to achieve, the reason they need the answer. Sharing it helps GitBook give you a better, more relevant answer. A goal is most helpful when it describes the outcome the user wants rather than restating the question. For example, with `ask=how do I create an API token`, a goal like `automate deployments from our CI pipeline` lets GitBook tailor the answer to that use case.
The response will contain a direct answer to the question and relevant excerpts and sources from the documentation.
Use this mechanism when the answer is not explicitly present in the current page, you need clarification or additional context, or you want to retrieve related documentation sections.